MFA Walkthrough implemented
This page shows the current MFA user journey from the Account Security page. It documents the actual product path in kind, not the backend policy model.
1. Open Account Security
From the signed-in app shell, go to Account -> Security.
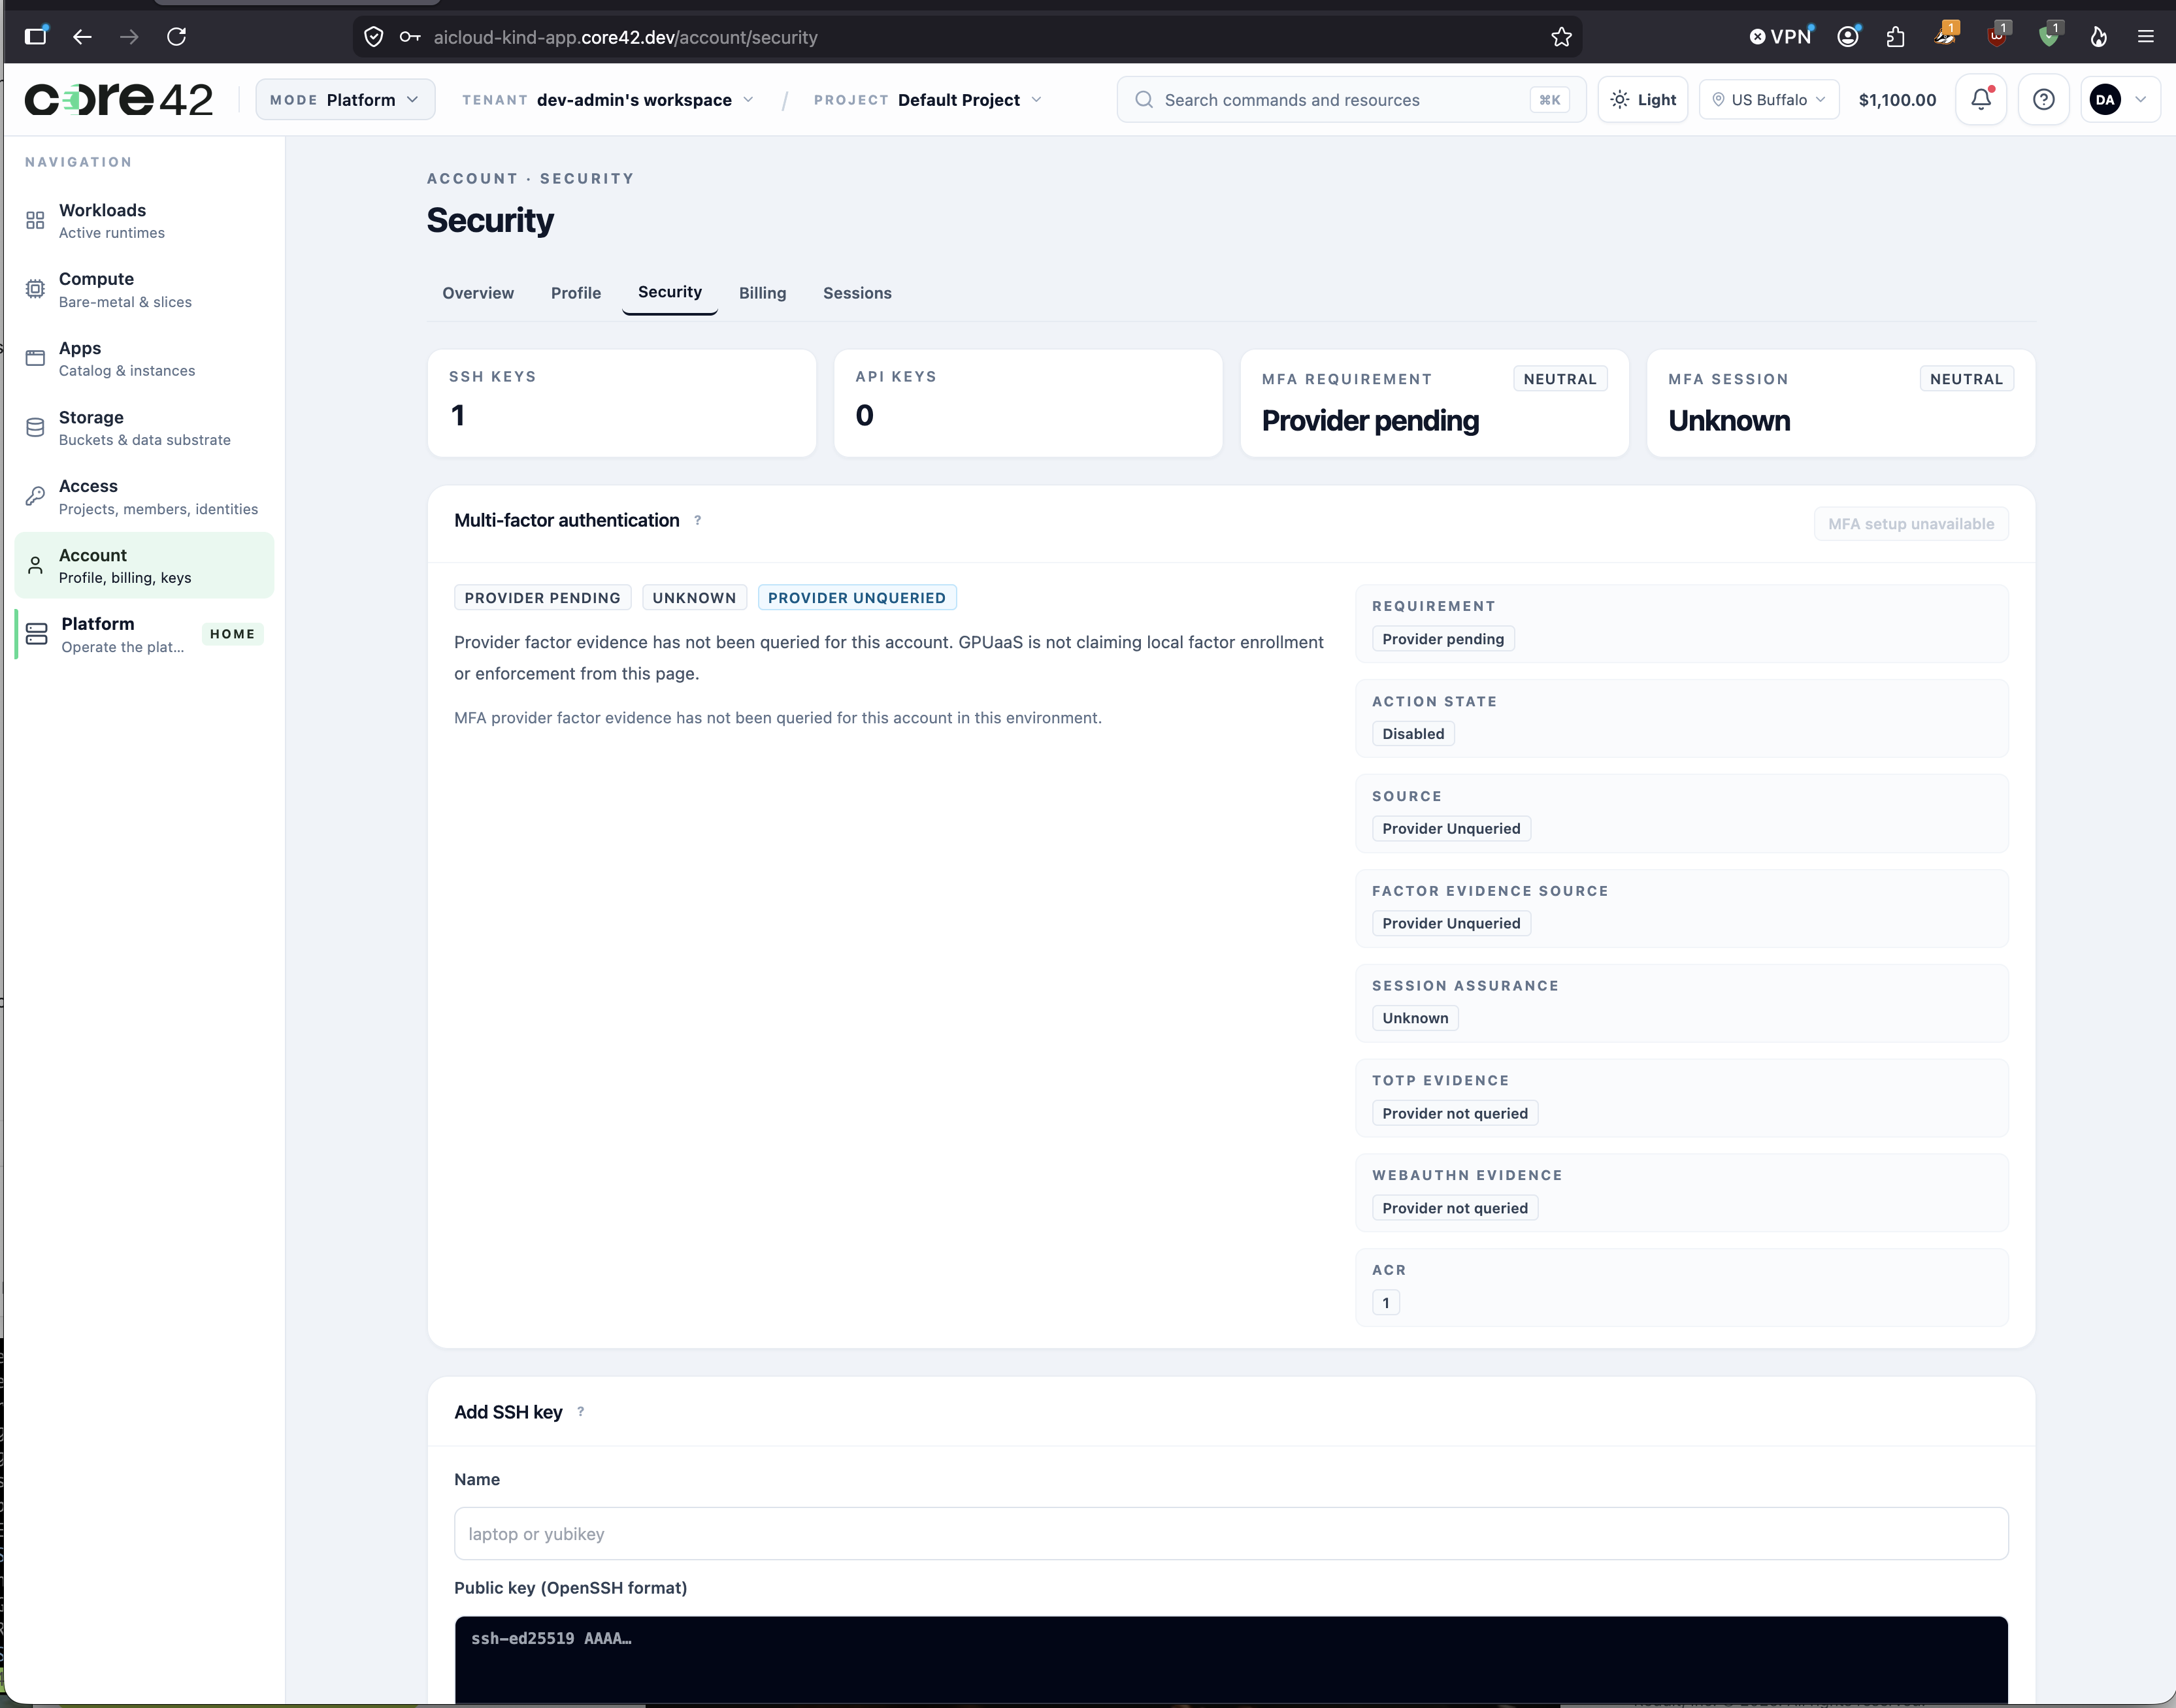
At this point the page should answer only three questions:
- Do I already have MFA?
- What can I do next?
- Where do I go if I lost access?
2. Set Up Your First Authenticator
Select Set up MFA.
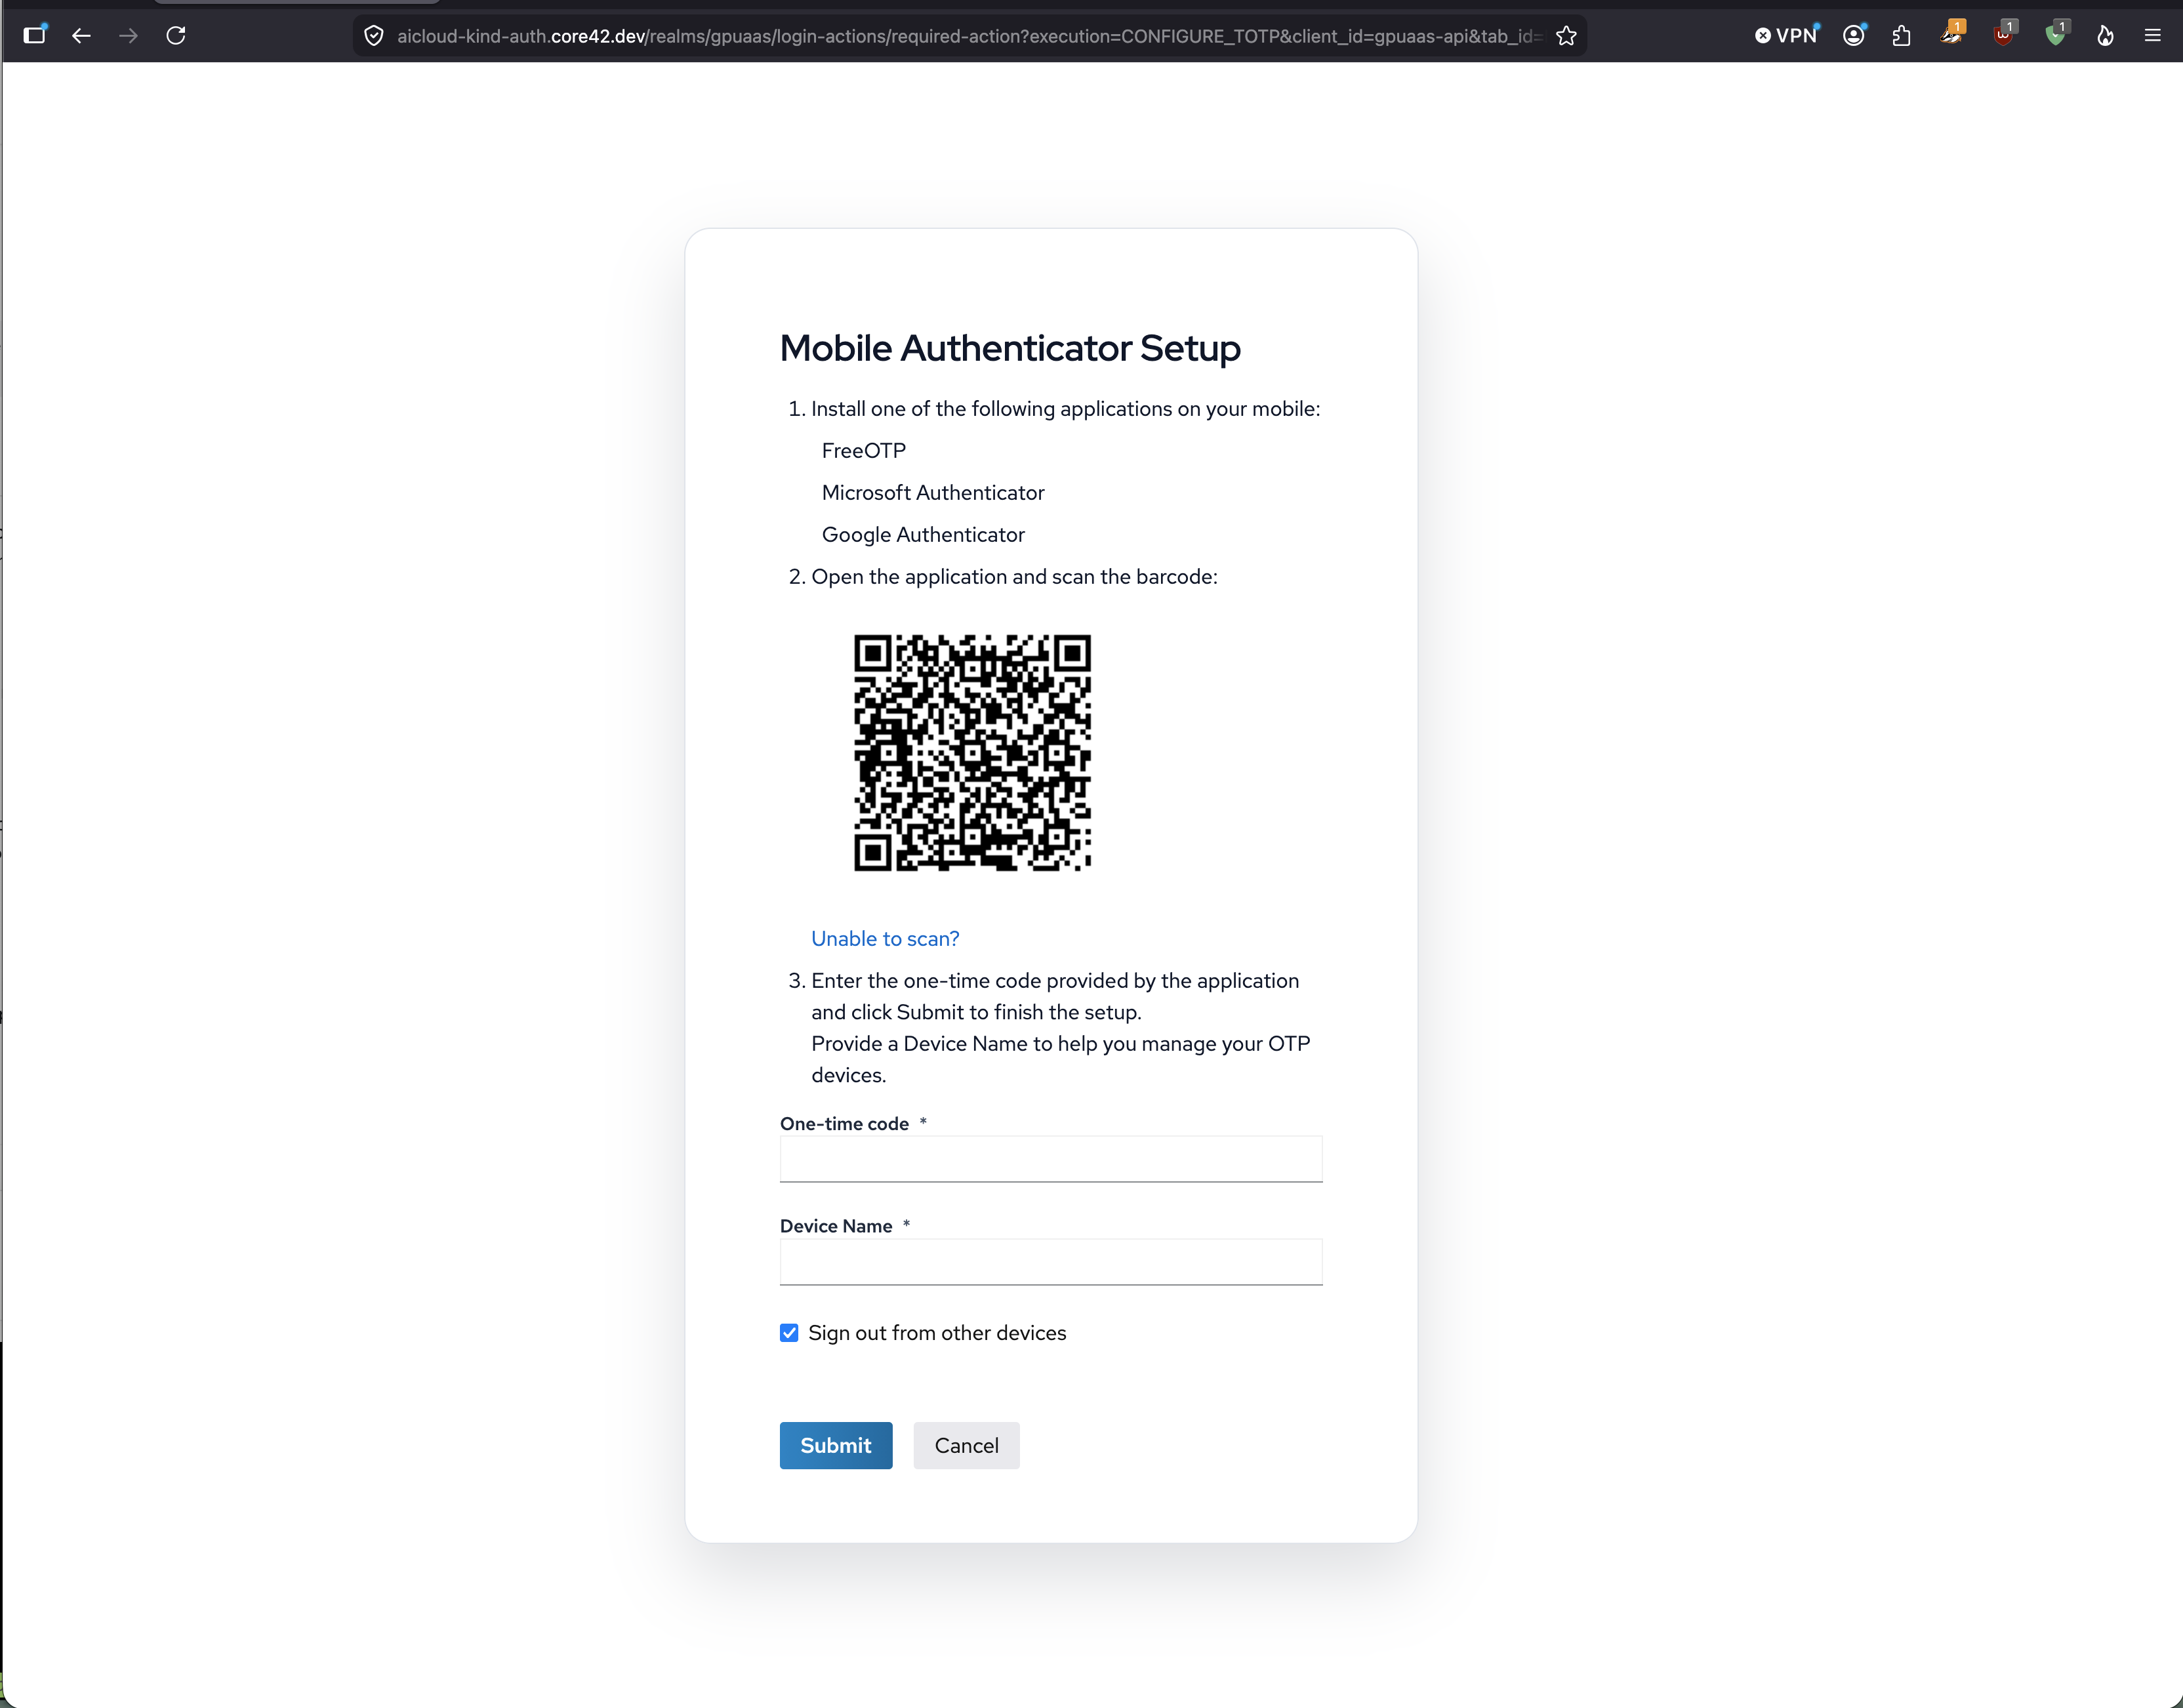
The product hands off to the identity-provider enrollment screen for the authenticator workflow.
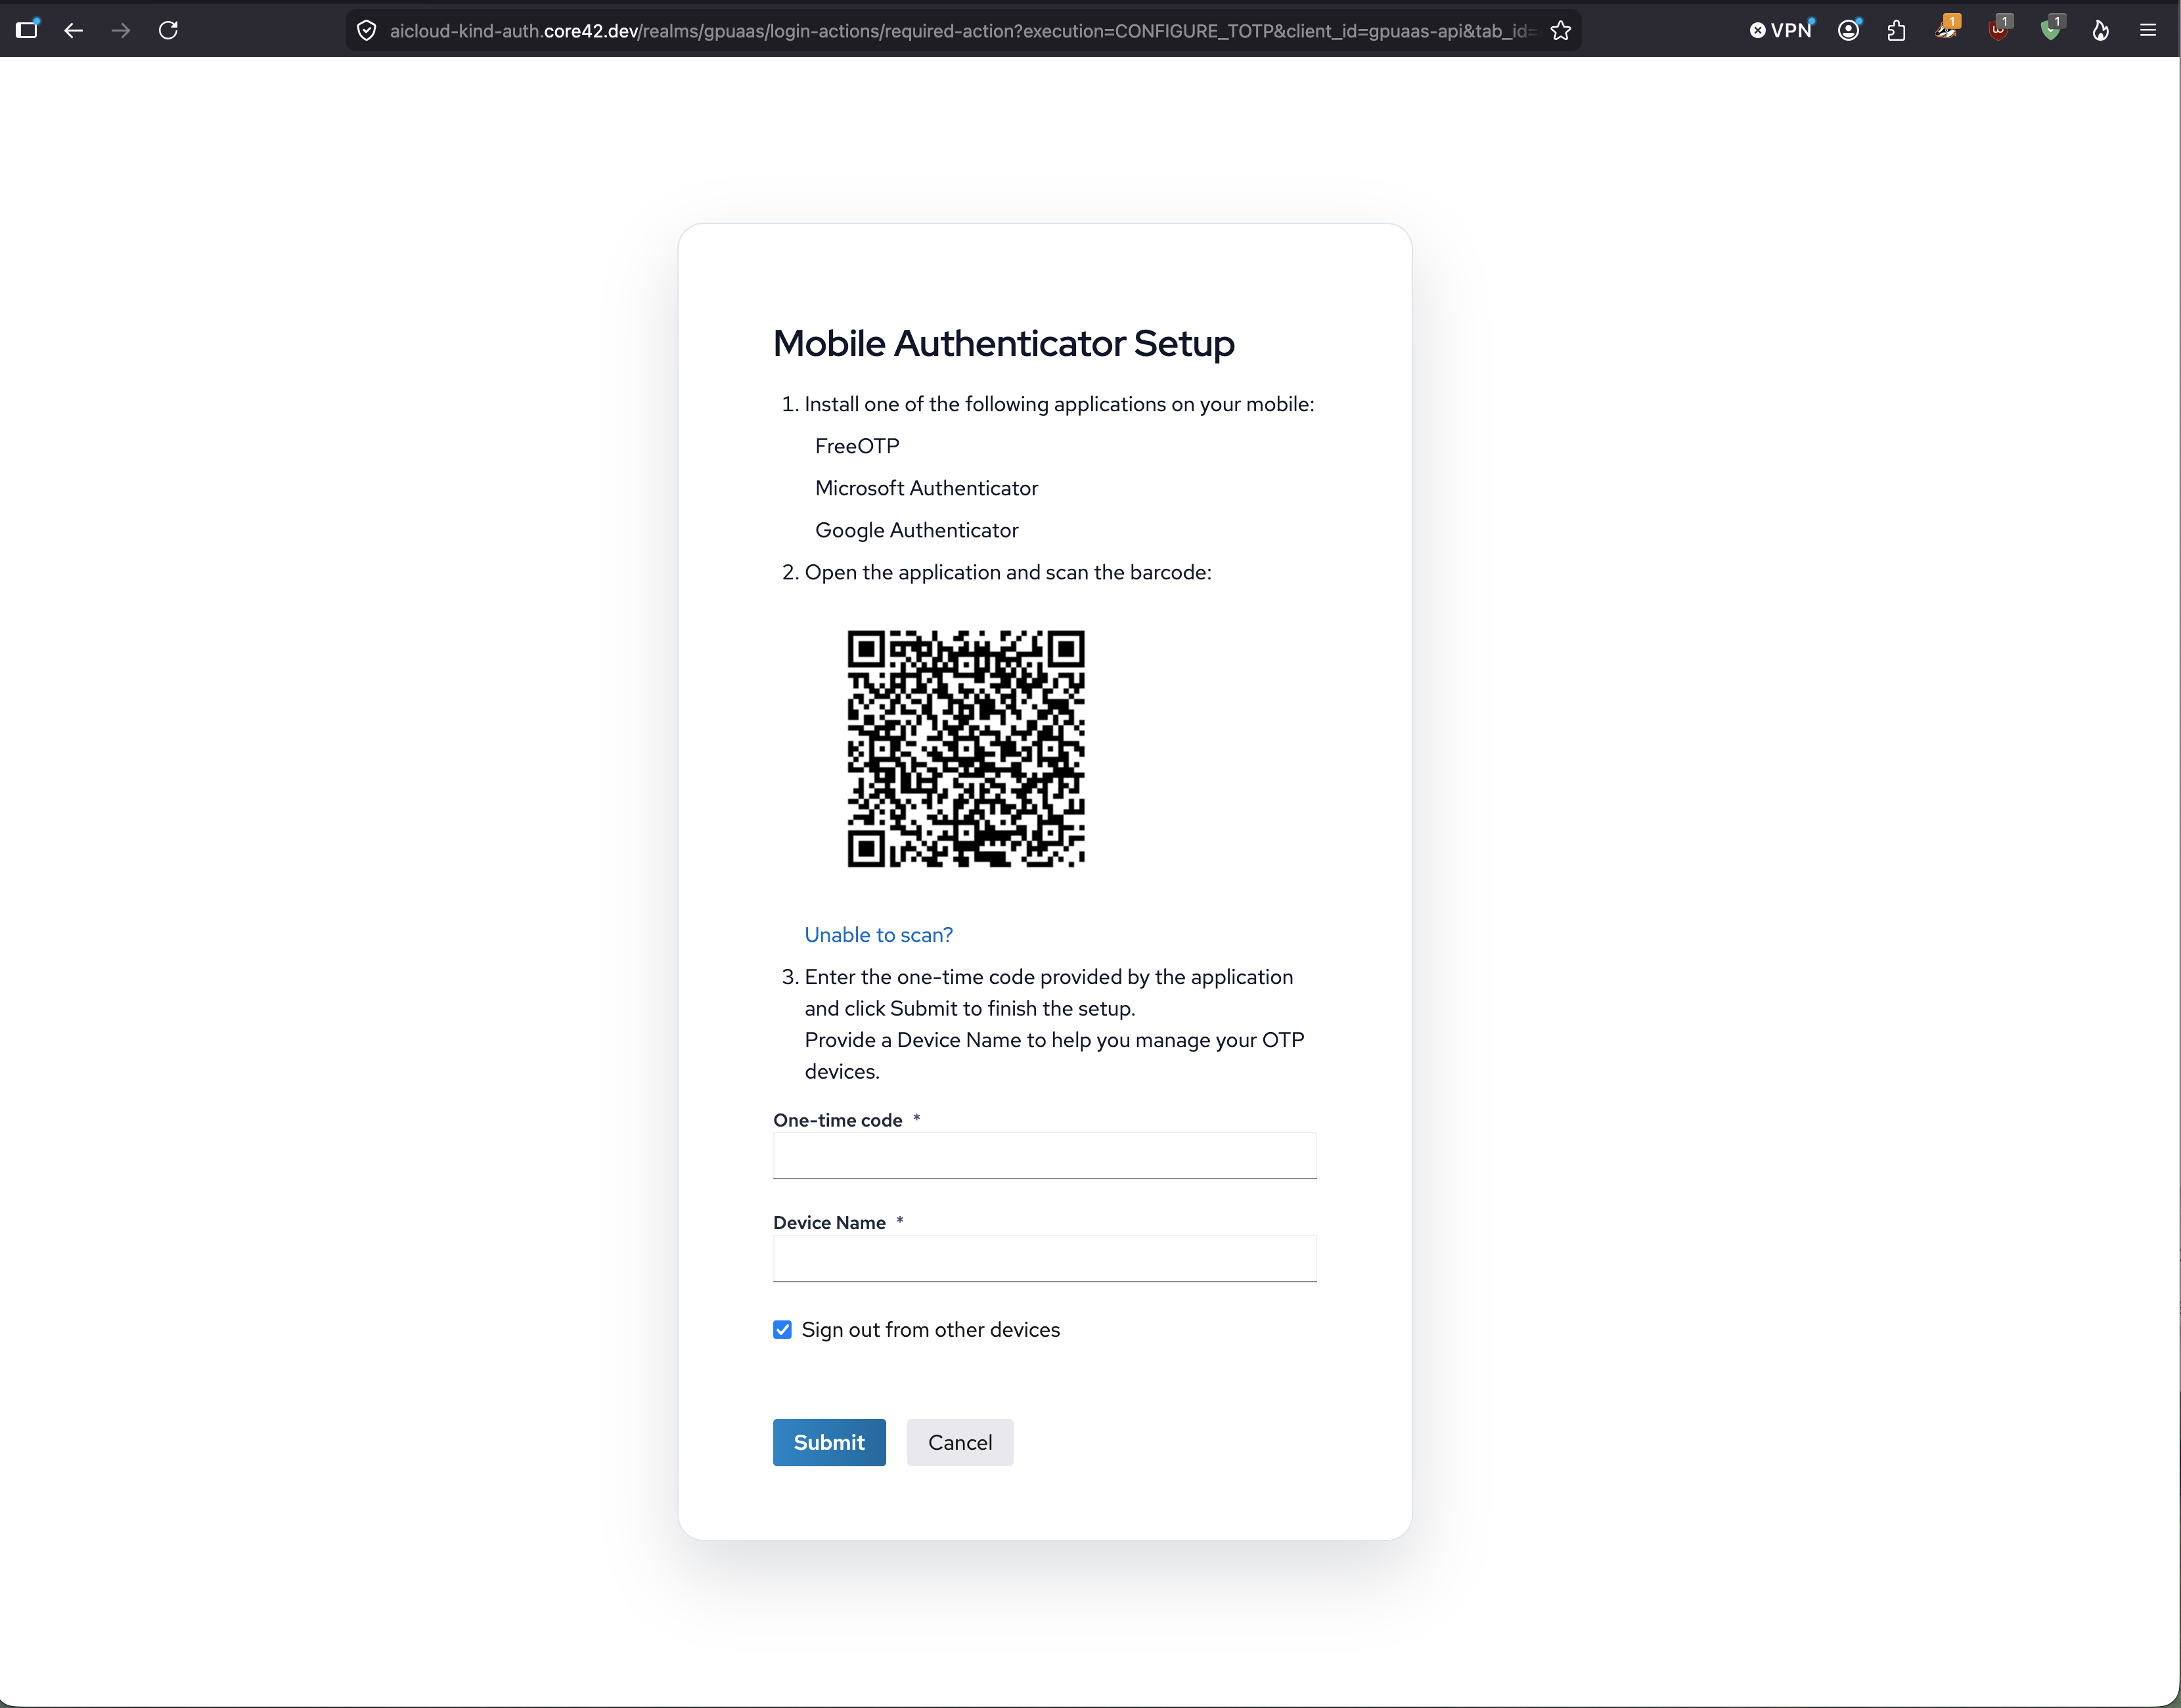
Do this on the provider screen:
- scan the QR code or enter the manual secret in the authenticator app;
- submit the one-time code;
- return to the account security page.
3. Confirm The Account Shows MFA
After enrollment, return to Account -> Security and use Refresh status if
needed.
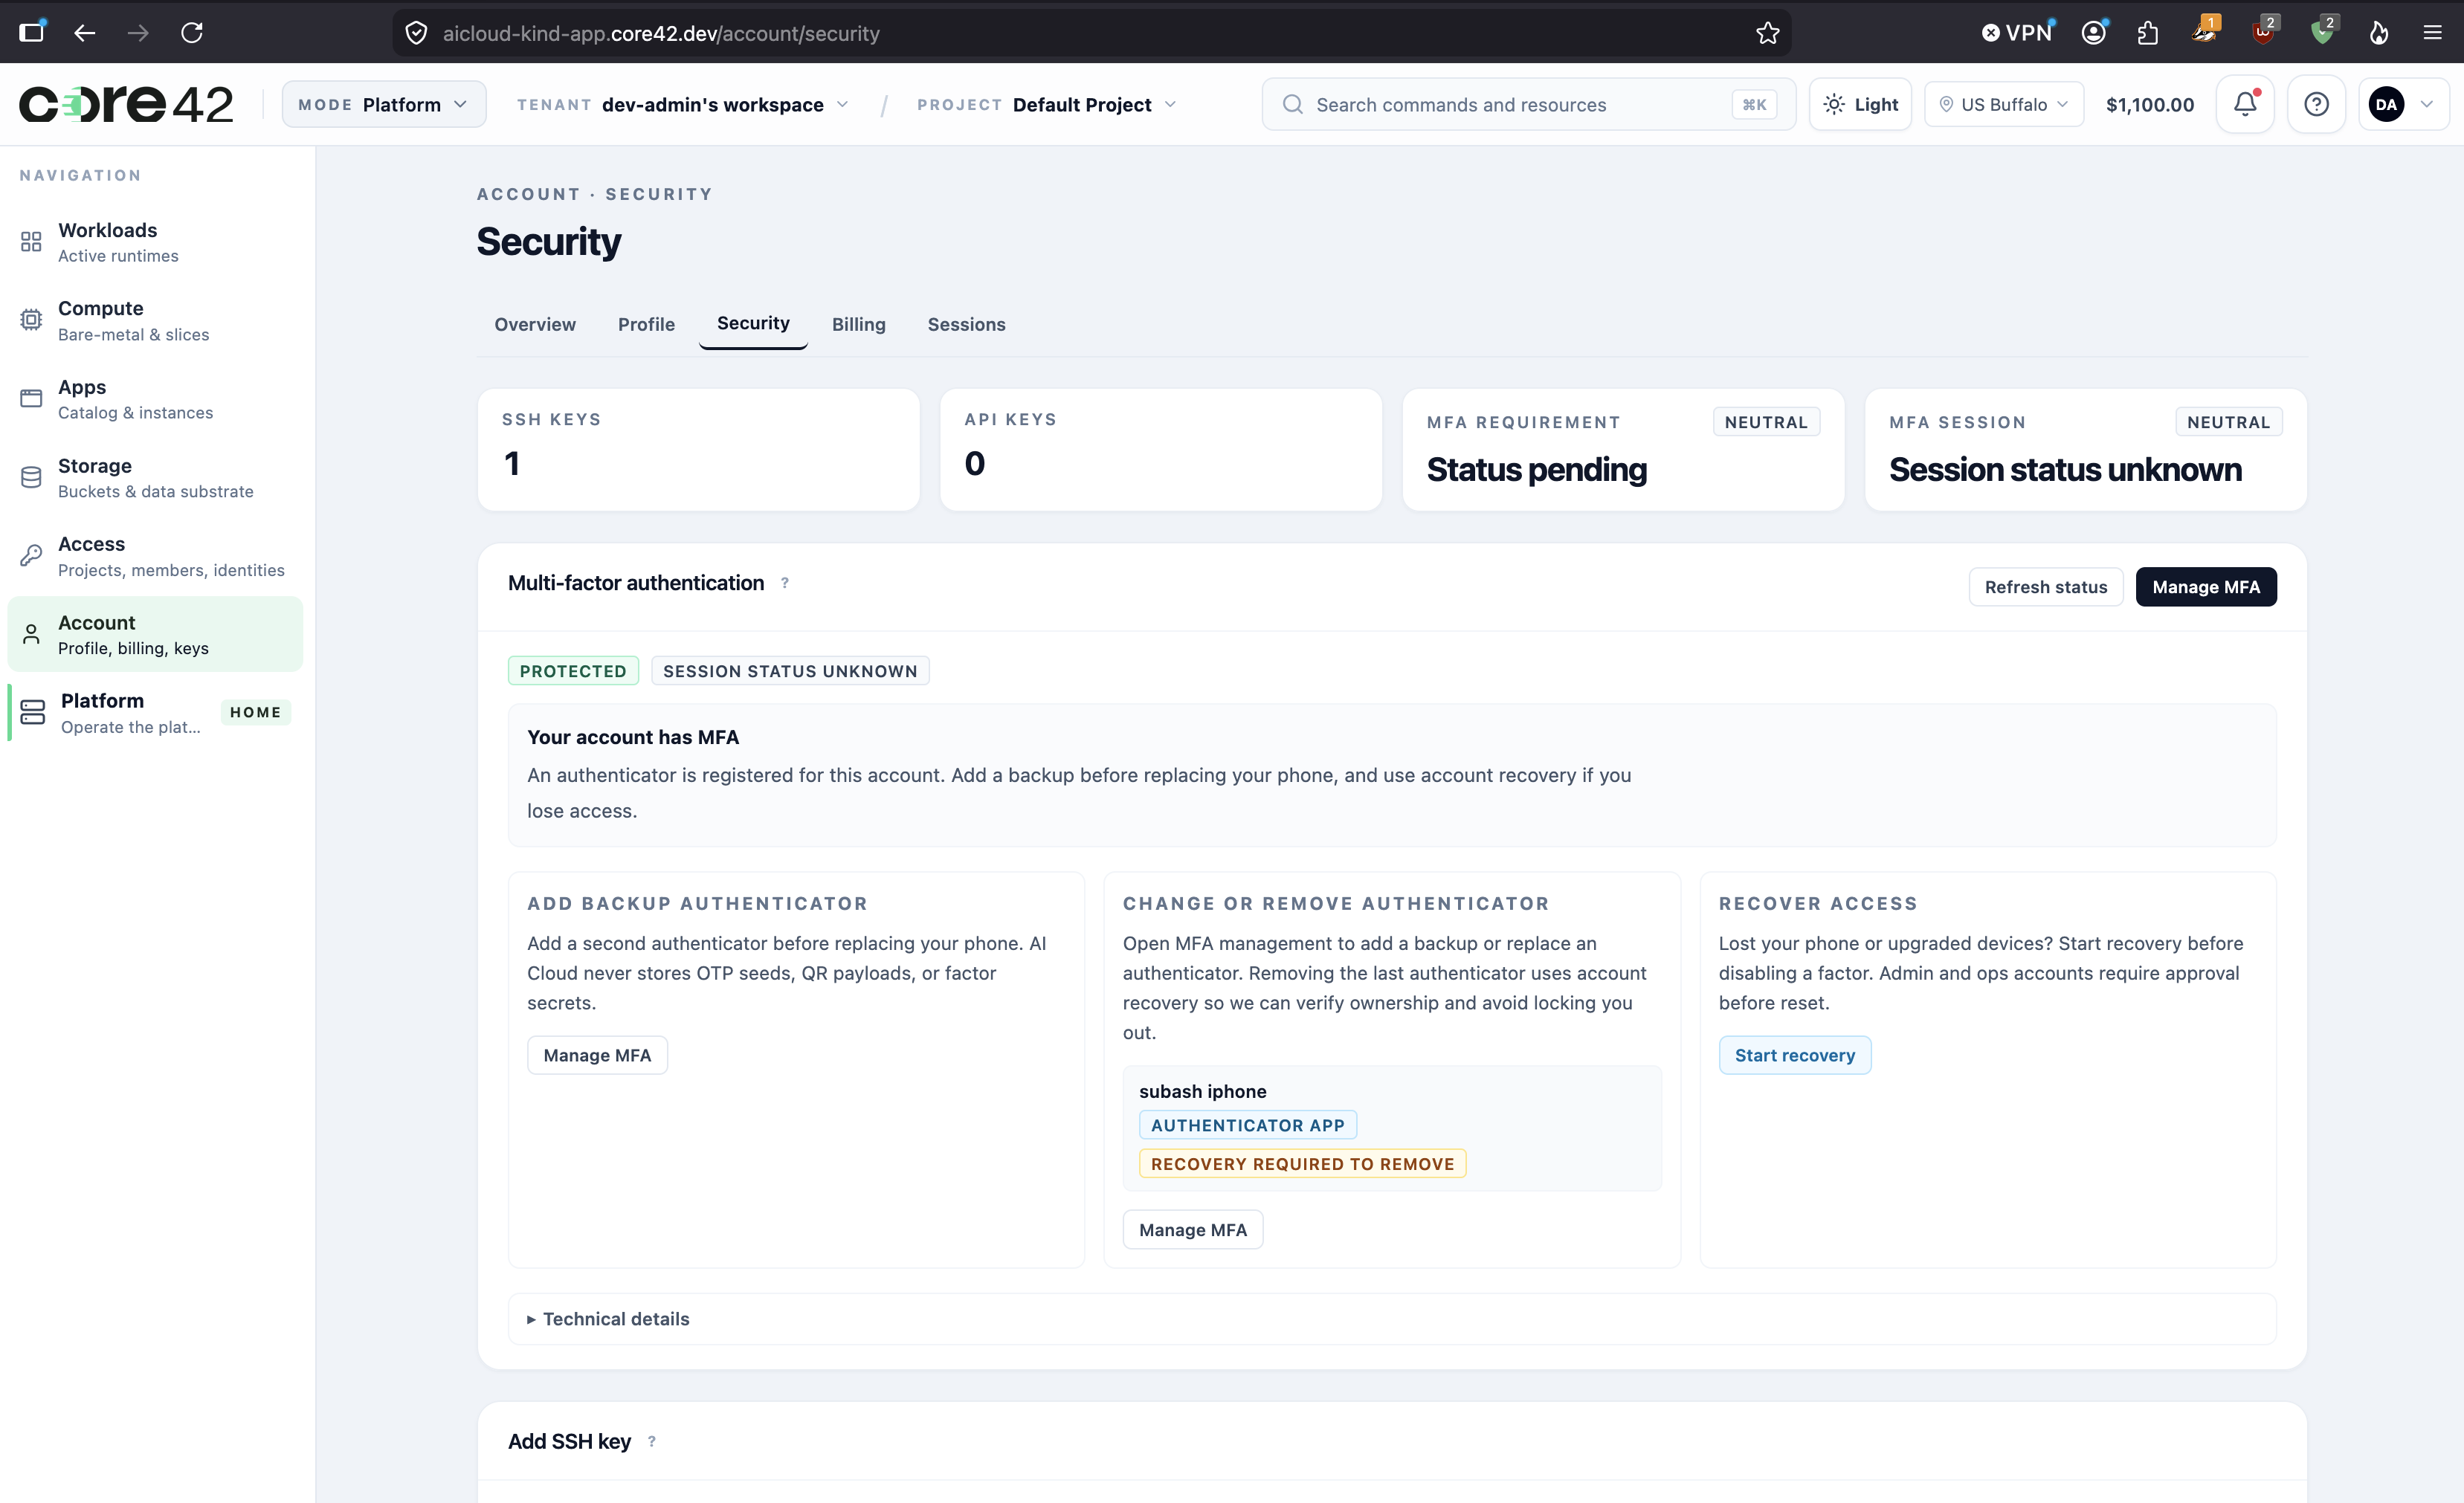
What the page should now show:
- the account is protected;
- a registered authenticator is listed;
Manage MFAis available for provider-side factor actions;Start recoveryis available for lost-device or replacement scenarios.
4. Refresh Pending State
If the product cannot refresh provider state yet, the account page stays usable but will show a pending or unknown state until readback succeeds.
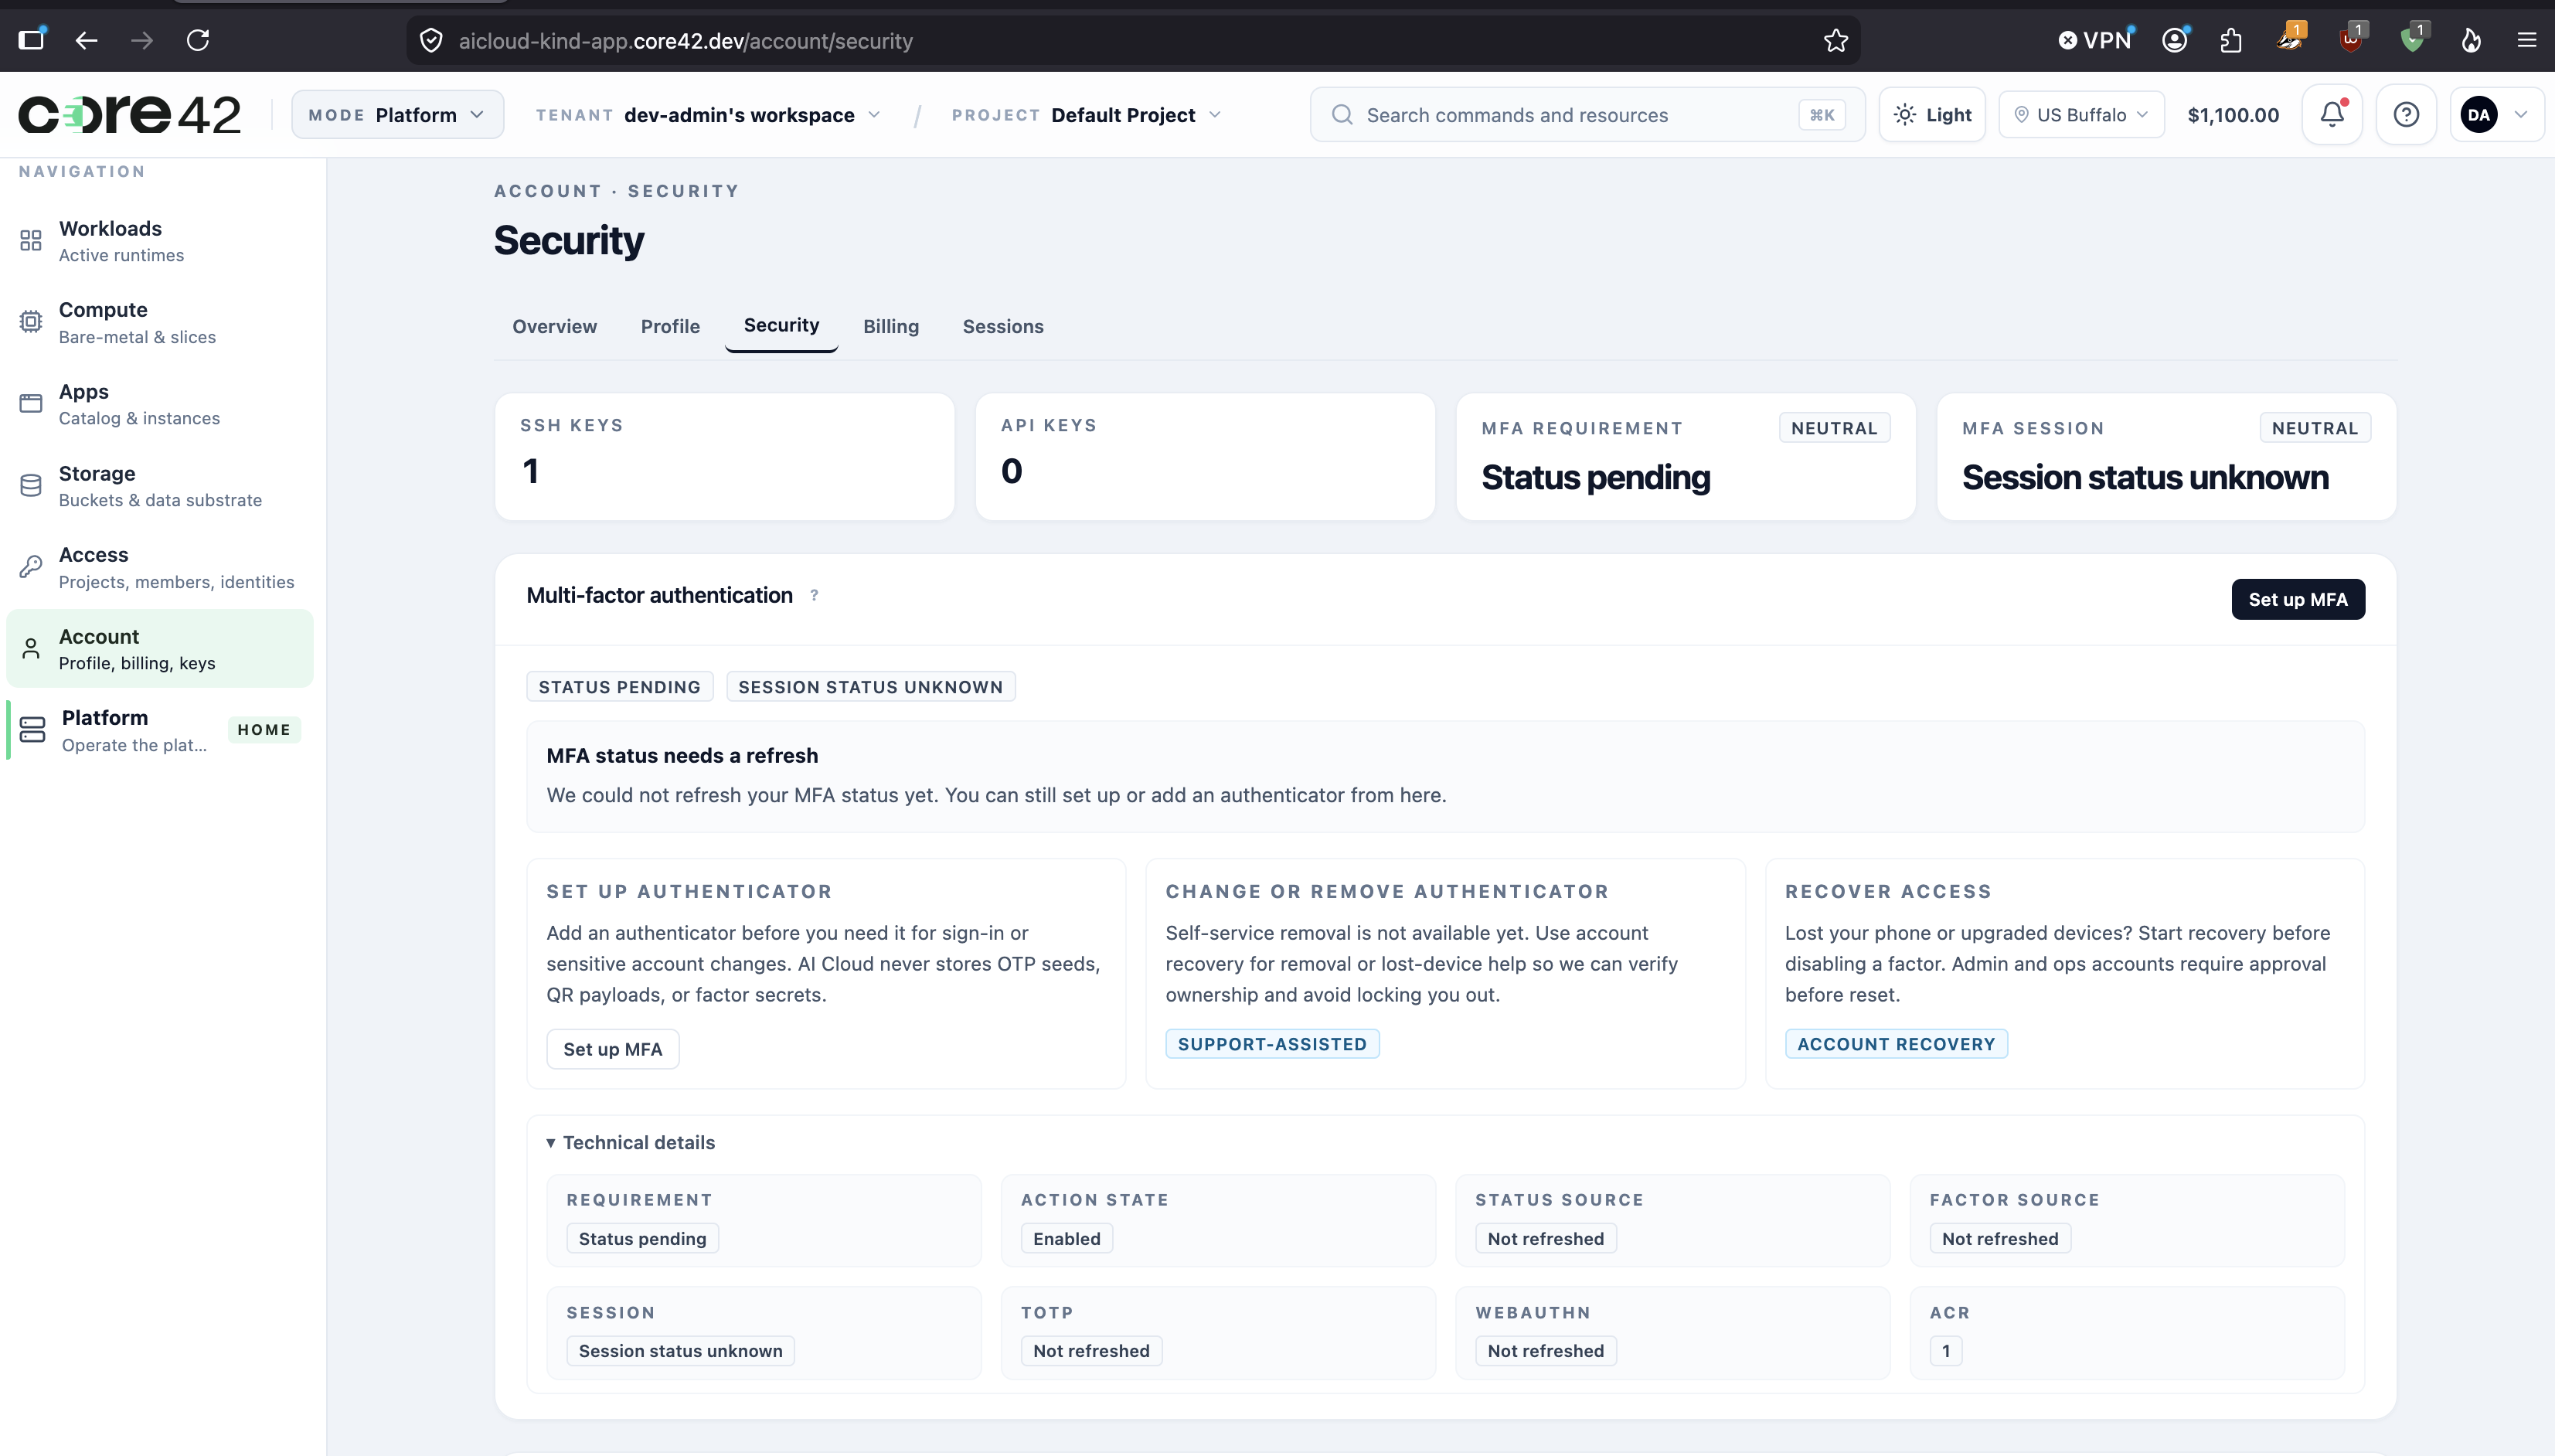
Use this state as guidance:
Set up MFAis still safe when no enrolled factor has been proven;Refresh statusshould be the first action after a successful provider return;- the technical panel is diagnostic only and should stay secondary to the user flow.
5. Manage An Existing Authenticator
From the protected account state, select Manage MFA.
Today that action re-enters the provider-managed authenticator flow:
Use this path for:
- adding a backup authenticator;
- replacing an authenticator while you still have access;
- provider-side changes that are already supported by the identity provider.
If the provider lands on a new enrollment screen instead of a true factor list, the product should treat that as an implementation gap, not as the user’s problem.
6. Recover Access
If you lost your phone or upgraded devices, start from Account -> Security
and select Start recovery.
Current product posture:
- recovery is account-scoped and support-assisted;
- daily users should request recovery before removing the last factor;
- privileged users must not silently bypass MFA through this path.
7. What This Page Must Not Do
The user-facing MFA page should not require the user to understand:
- Keycloak route names;
- provider diagnostics;
- governance/readiness policy text;
- internal product names such as
GPUaaS.
Those belong in admin/operator or collapsed technical sections, not in the primary user workflow.
Known Review Points
This walkthrough is based on the current kind flow and is the right acceptance bar for product review:
- setting up the first authenticator;
- seeing a protected post-enrollment state;
- refreshing provider-backed status;
- entering manage flow from an existing factor state;
- entering recovery from the account surface.
If any of these screens change, refresh the screenshots and rerun the user-flow UAT before claiming the MFA journey is complete.